CAM AGENT User Manual
Milling Automation for General Parts | Version 1.0
Currently, CAM AGENT supports Windows OS and Metric system only.
1. Installation and Getting Started
Get started in 4 simple steps:
- Download the .exe installer (Trial) from the website homepage
- Important: Please close Autodesk Fusion 360 before installation
- Double-click the installer and follow the steps by clicking Next
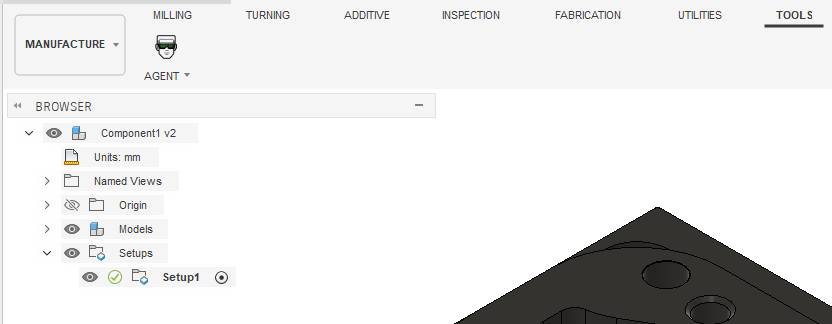
- Open Fusion 360, go to the "Manufacture" Workspace, click the Utilities tab and run CAM AGENT
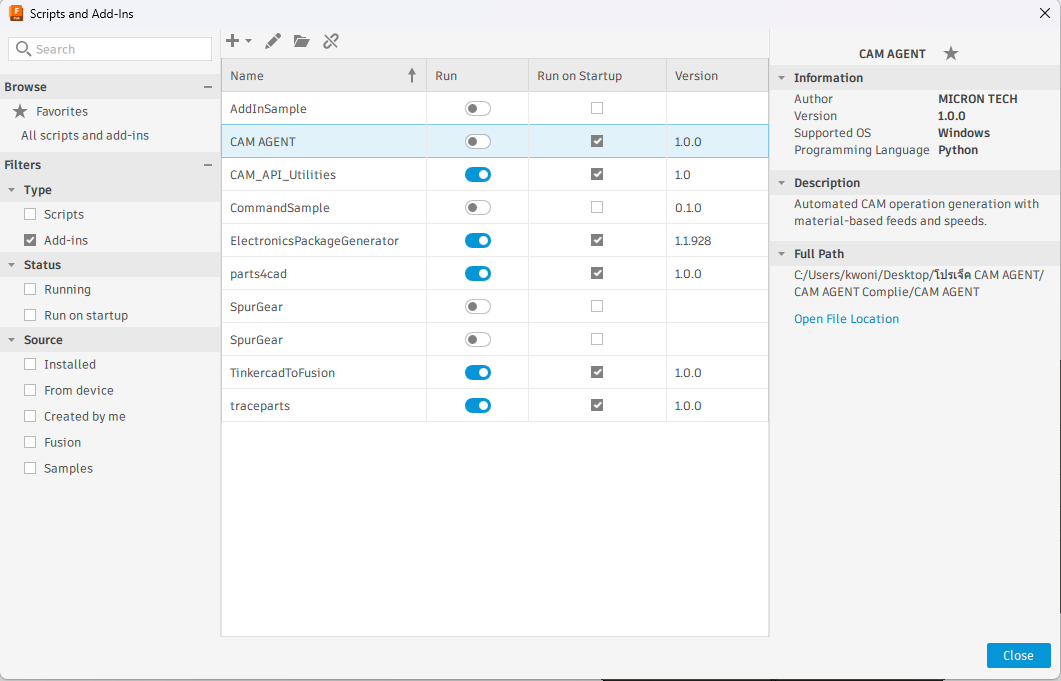
You will find the TOOLS tab (next to Utilities). CAM AGENT will be there.
Activation (First Time):
For Trial version, the system will automatically enable 50 uses when you run the command for the first time. No registration or account creation required.
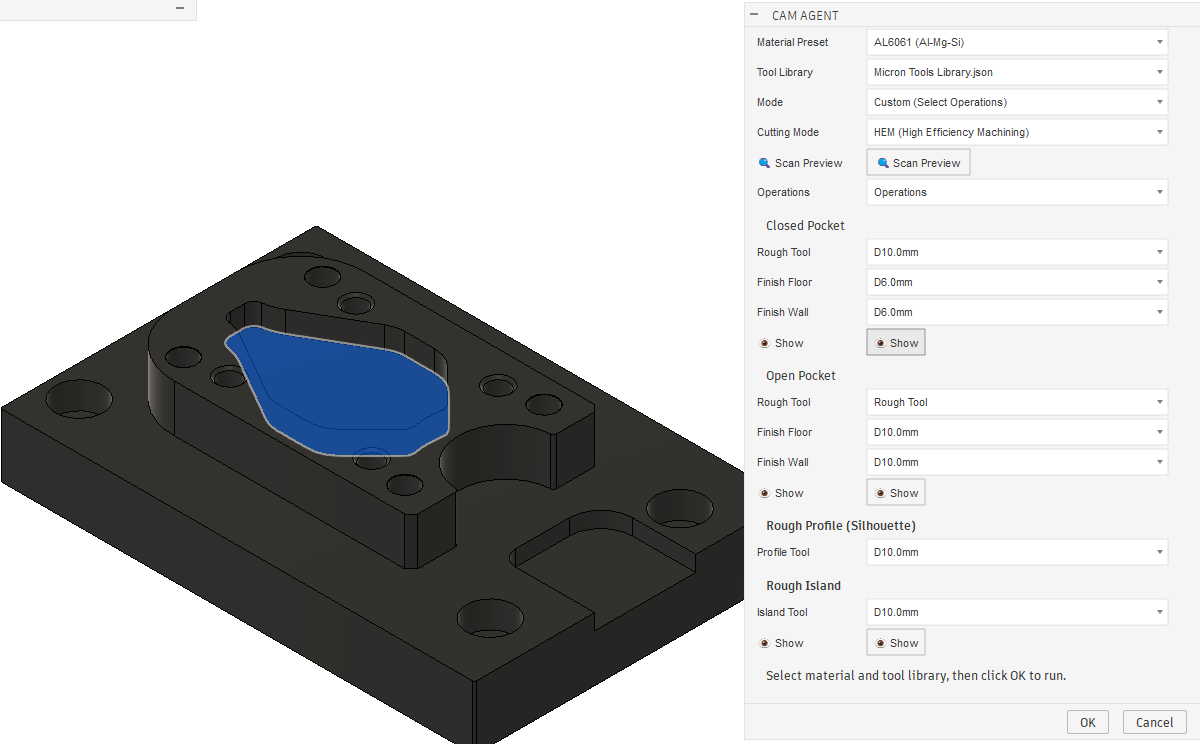
2. UI Overview
The main CAM AGENT window consists of:
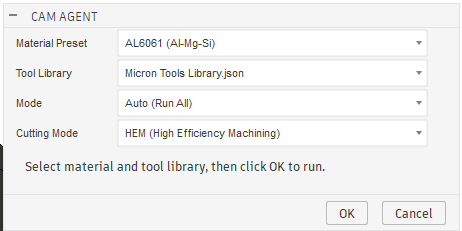
- Run Mode: Select run mode (Auto / Custom)
- Cutting Mode: Select cutting style (Standard / HEM)
- Material: Select workpiece material
- Tool Library: Select tool library
- Run / Cancel: Start or cancel buttons
3. Run Mode
CAM AGENT has 2 run modes:
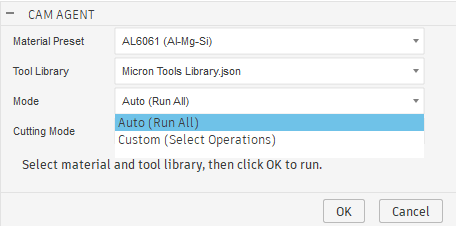
Auto Mode
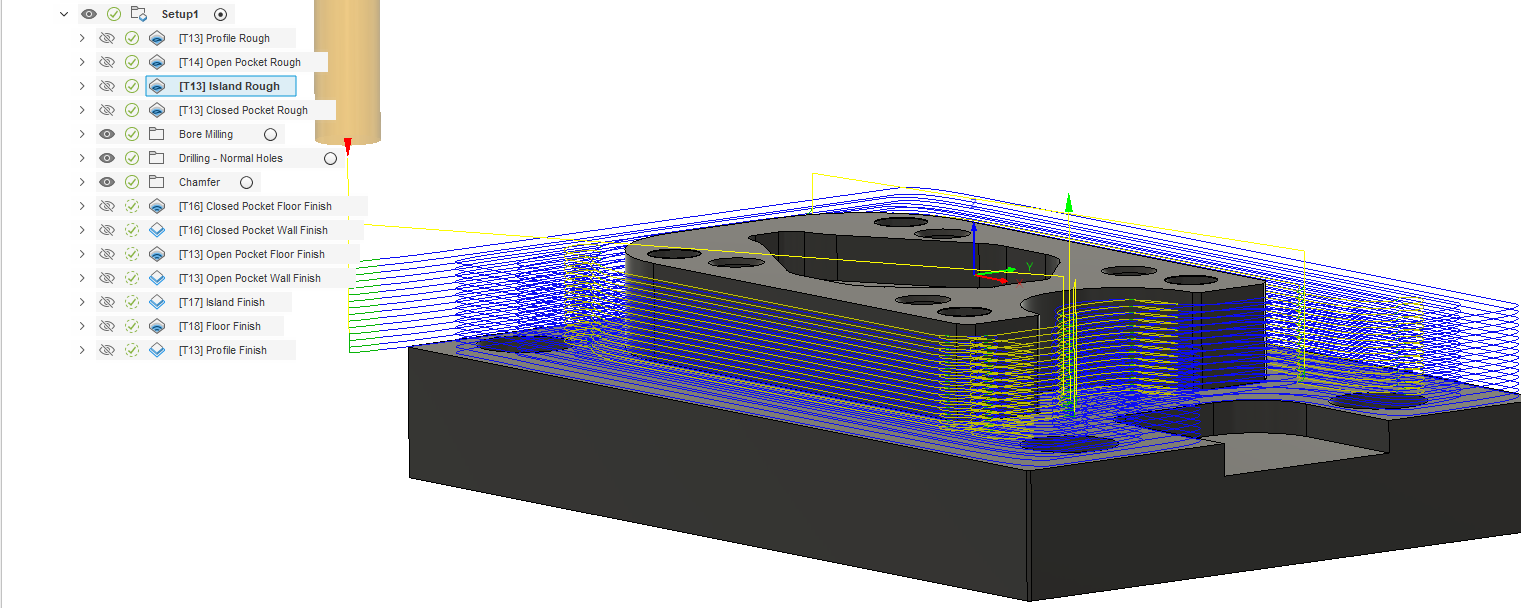
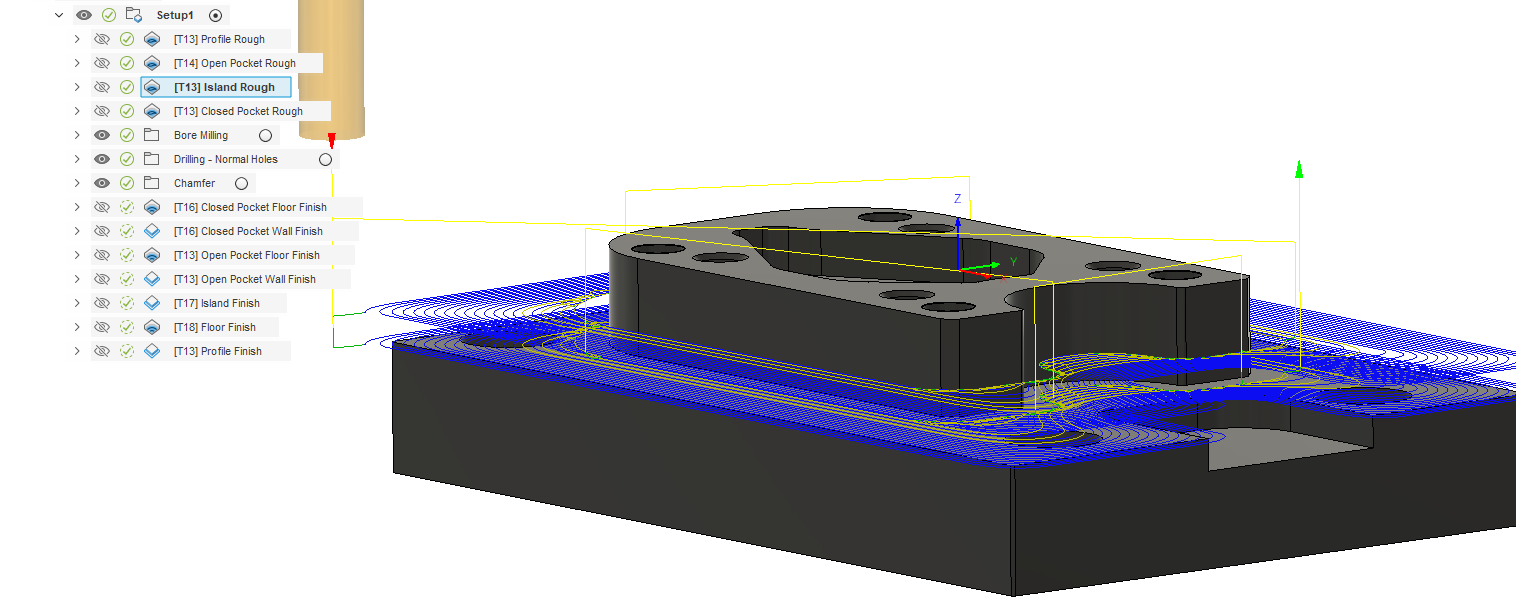
Fully automatic mode - CAM AGENT analyzes the workpiece and creates all Operations automatically. Suitable for general work requiring speed.
Custom Mode
Custom mode - Users can select which Agents to use as needed and adjust various Parameters in detail.
Custom Mode Demo Video:
4. Cutting Mode
Choose the cutting style that suits your work:
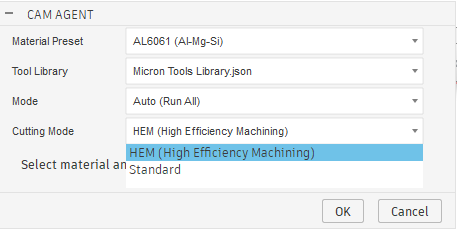
Standard Mode:
Standard mode, suitable for general work. Uses standard cutting values and feed rates.
HEM Mode (High Efficiency Milling):
High efficiency milling mode - Uses small Stepover but large Stepdown. Suitable for work requiring speed and reduced tool wear.
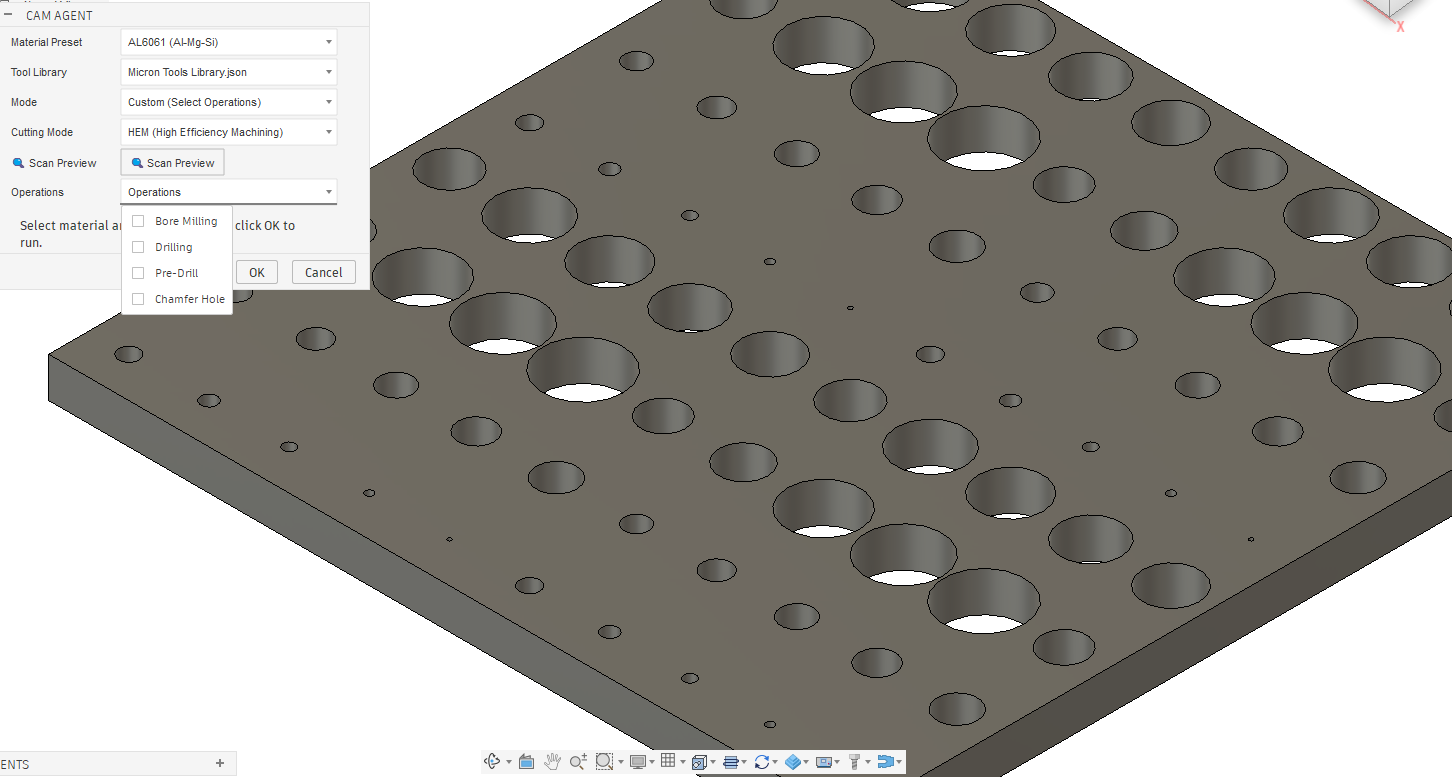
5. Smart Context
In Custom Mode, CAM AGENT analyzes the workpiece and displays only Operations that are suitable for your workpiece. It doesn't show irrelevant Operations.

For example:
- If workpiece has Pocket → Pocket Agent will be shown
- If workpiece has holes → Drill Agent will be shown
- If workpiece has threaded holes → Thread options will be shown
Hole Detection
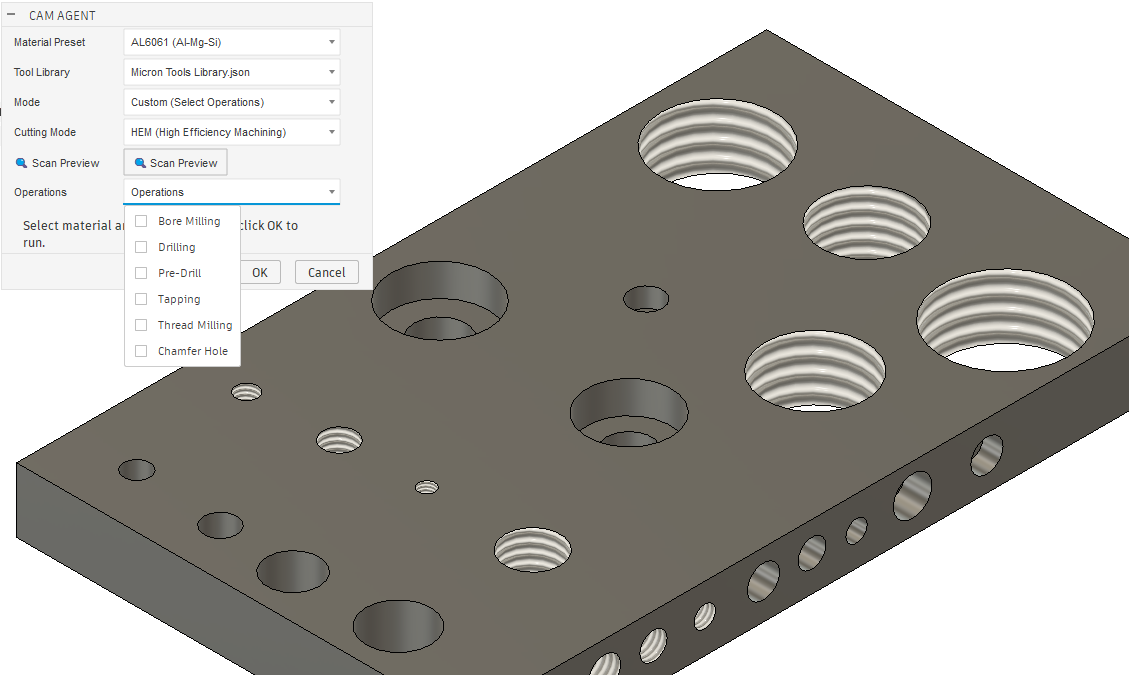
Thread Hole Management
6. Hole Searcher (Free)
A tool to scan your workpiece and quickly view all hole information - Free to use, doesn't count against your quota!
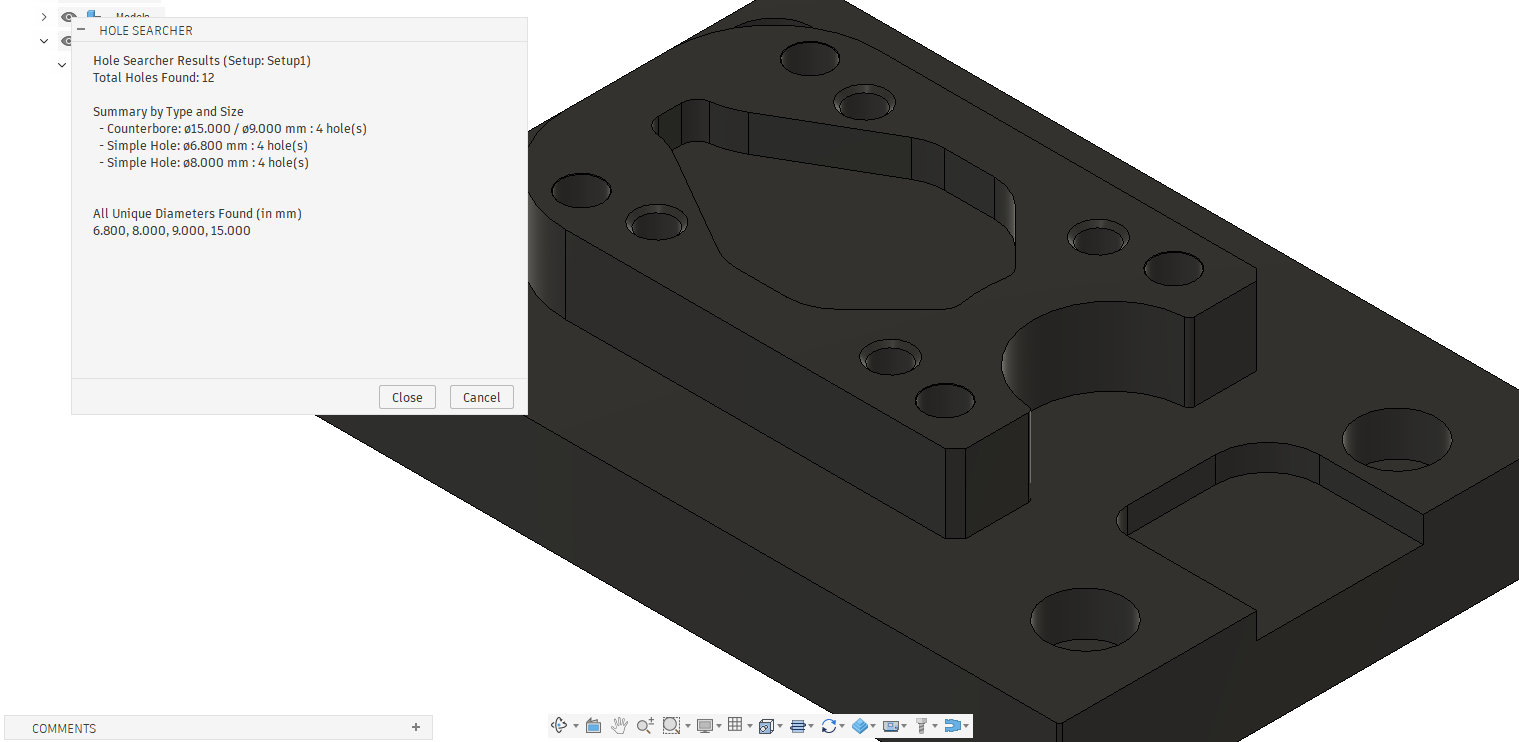
- Make sure you have the Setup you want to work with activated
- Click the Hole Searcher button
- Read the summary report of holes found
7. Remover (Free)
Chain drilling to remove large material areas.
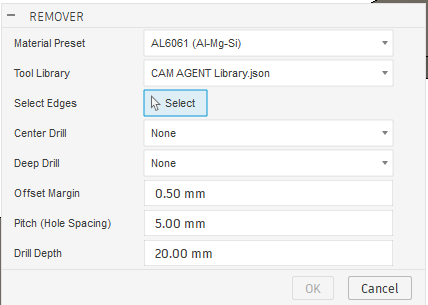
- Select Material and Tool Library
- Select edges for Chain Drill
- Define offset direction
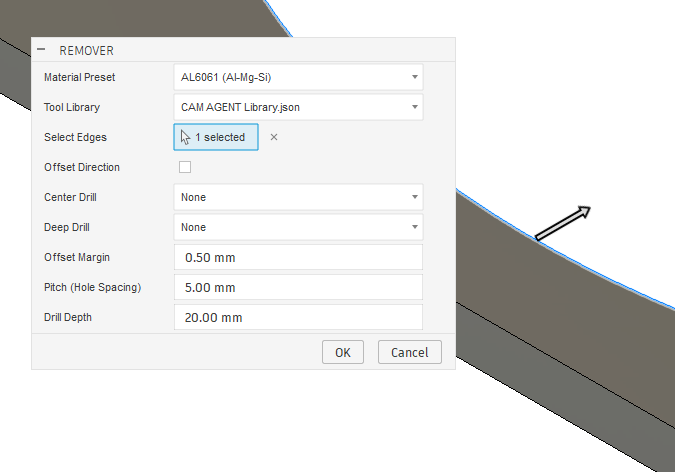
- Select drill size - Offset distance from edge is calculated automatically
- Offset Margin - Additional offset distance
- Pitch - Hole spacing (measured from center to center)
- Drill Depth - Drilling depth (measured from chain)

- Example result
8. Manage Materials
Customize Feeds & Speeds values for your machine.
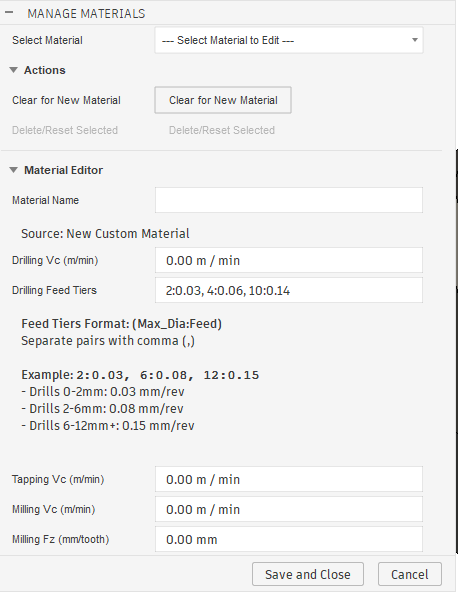
- Vc (Surface Speed): Cutting speed (m/min)
- Fz / Fn: Feed per tooth or per revolution
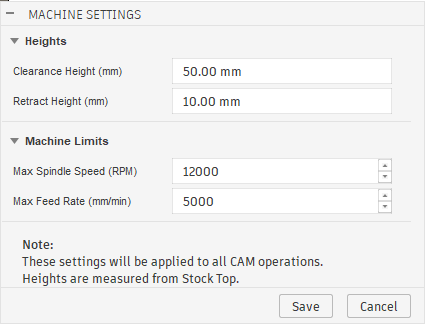
9. Machine Settings
Configure Clearance/Retract Heights and Machine Limits.
10. Frequently Asked Questions (FAQ)
Q: What to do when quota is used up?
A: Contact us to purchase a Subscription or wait for additional package updates.
Q: Agent not showing in Custom Mode?
A: This is due to Smart Context - if workpiece doesn't have geometry suitable for that Agent, the system will hide it automatically.
Contact Us
If you have questions or issues, contact us at 065-843-4436