User Manual
Product: HOLE MAKER (Fusion 360 Add-in) | Version: 2.0
1. Installation and Getting Started
Get started in 4 simple steps:
- Download the .exe installer (Standard or Trial) from the website homepage
- Important: Please close Autodesk Fusion 360 before installation
- Double-click the installer and follow the steps by clicking Next
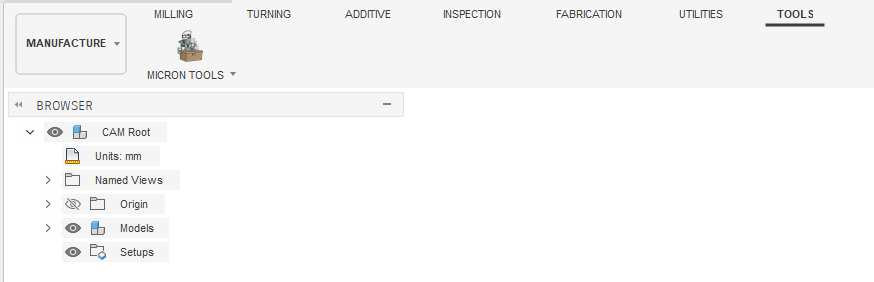
- Open Fusion 360, go to the "Manufacture" Workspace, click the Utilities tab and run HOLE MAKER
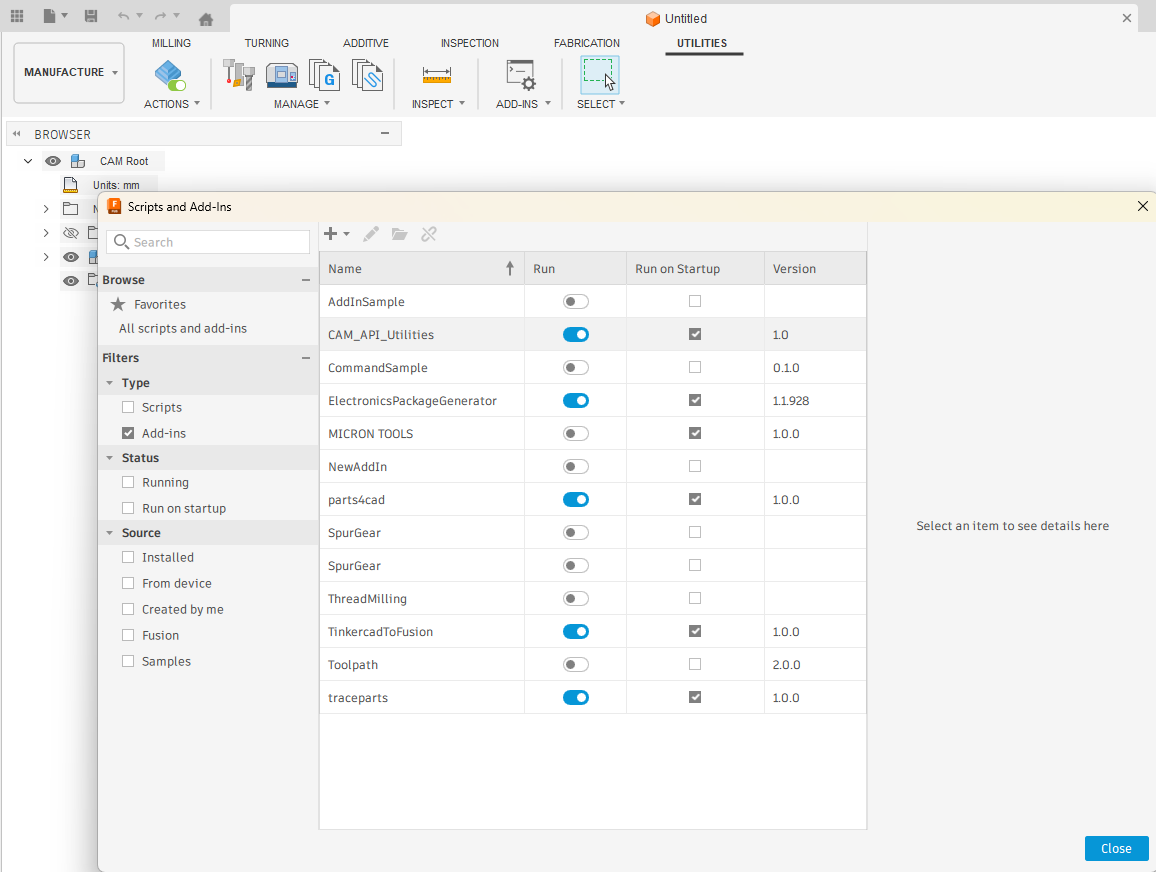
You will find the TOOLS tab (next to Utilities). HOLE MAKER will be there.
2. Activation
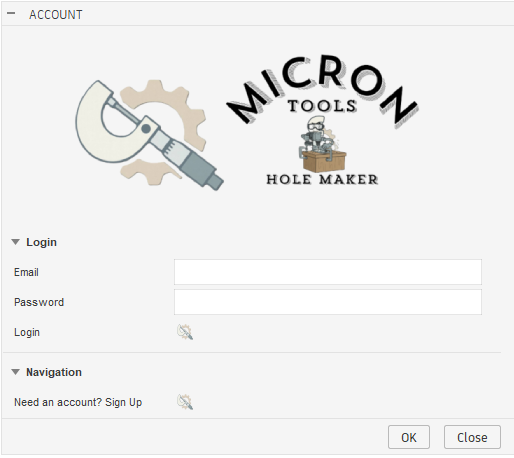
For Standard Version (Subscription):
- Click the Account button on the toolbar
- Select Sign Up to create a new account or Log In if you already have one
- When status shows Status: ACTIVE you can start using immediately
For Trial Version:
The system will automatically enable 50 uses when you run the command for the first time.
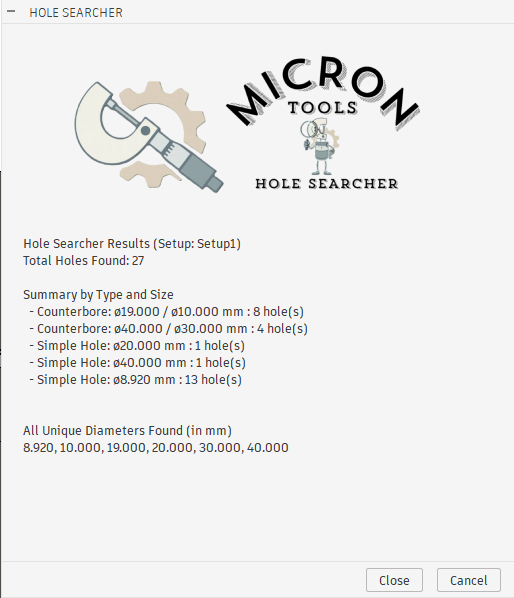
3. Feature: Hole Searcher (Free)
A tool to scan your workpiece and quickly view all hole information.
- Make sure you have the Setup you want to work with activated
- Click the Hole Searcher button
- Read the summary report of holes found (categorized by Simple, Counterbore, Tap)
4. Feature: Hole Maker
The core feature for automatic Toolpath creation.
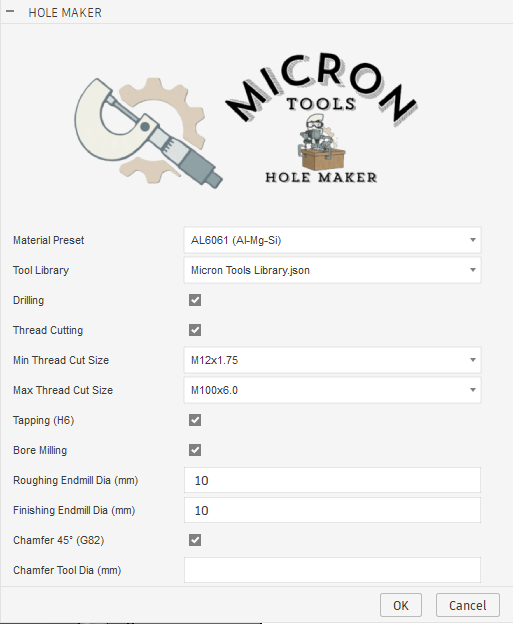
- Material Preset: Select workpiece material (program will calculate Feed/Speed)
- Tool Library: Select the Tool Library containing your drills (HOLE MAKER Library is included as default)

Select Operations:
- Drilling:
- Center drilling + deep drilling
- The program selects drill based on available drill sizes. For example, for a 5.2mm hole, there must be a 5.2mm drill in the Library
- Tapping (H6): For tapped holes, basic drilling operations (Center Drill / Drill) will be created separately from regular holes
- Thread Cutting:
- The program selects a tool with matching pitch to the thread hole
- Program doesn't focus on tool diameter but selects the largest (strongest) that fits the hole
- If selecting Thread Cutting + Tapping (H6), Tap Operation will only be created for holes not larger than Min Thread Cut Size
- Bore Milling:
- For Counter Bore type holes only
- Creates Bore Milling Operation for holes smaller than the Rough Endmill diameter
- Chamfer 45°:
- Deburr hole edges using G82
- Only holes smaller than the Chamfer tool diameter will be processed
Click OK and the program will create Toolpaths in the Setup immediately.
5. Feature: Manage Materials
Customize Feeds & Speeds formulas for your machine.

- Vc (Surface Speed): Cutting speed (m/min)
- Fz / Fn: Feed per tooth or per revolution
- Drilling Feed Tiers: Set Feed Per Revolution by drill size (e.g.,
2:0.03, 6:0.08means drills smaller than 2mm use 0.03 Feed Per Revolution)
To create new Materials, enter a name in Material Name and adjust values immediately
(no need to click Select Material to Edit). New materials will appear in Hole Maker.
To modify existing Materials, select "Select Material to Edit" to make changes.
Click Save and Close to save.
*To delete a newly added Material, select it and click Delete/Reset (built-in Materials cannot be deleted but can be Reset to default values).
6. Frequently Asked Questions (FAQ)
Q: Program can't find drill (Warning: No drill tool found)?
A: Check that the selected Tool Library contains a drill with diameter matching the hole you want to drill.
Q: Can't log in (Login Failed)?
A: Check your internet connection and password. If you forgot your password, contact admin via Line.